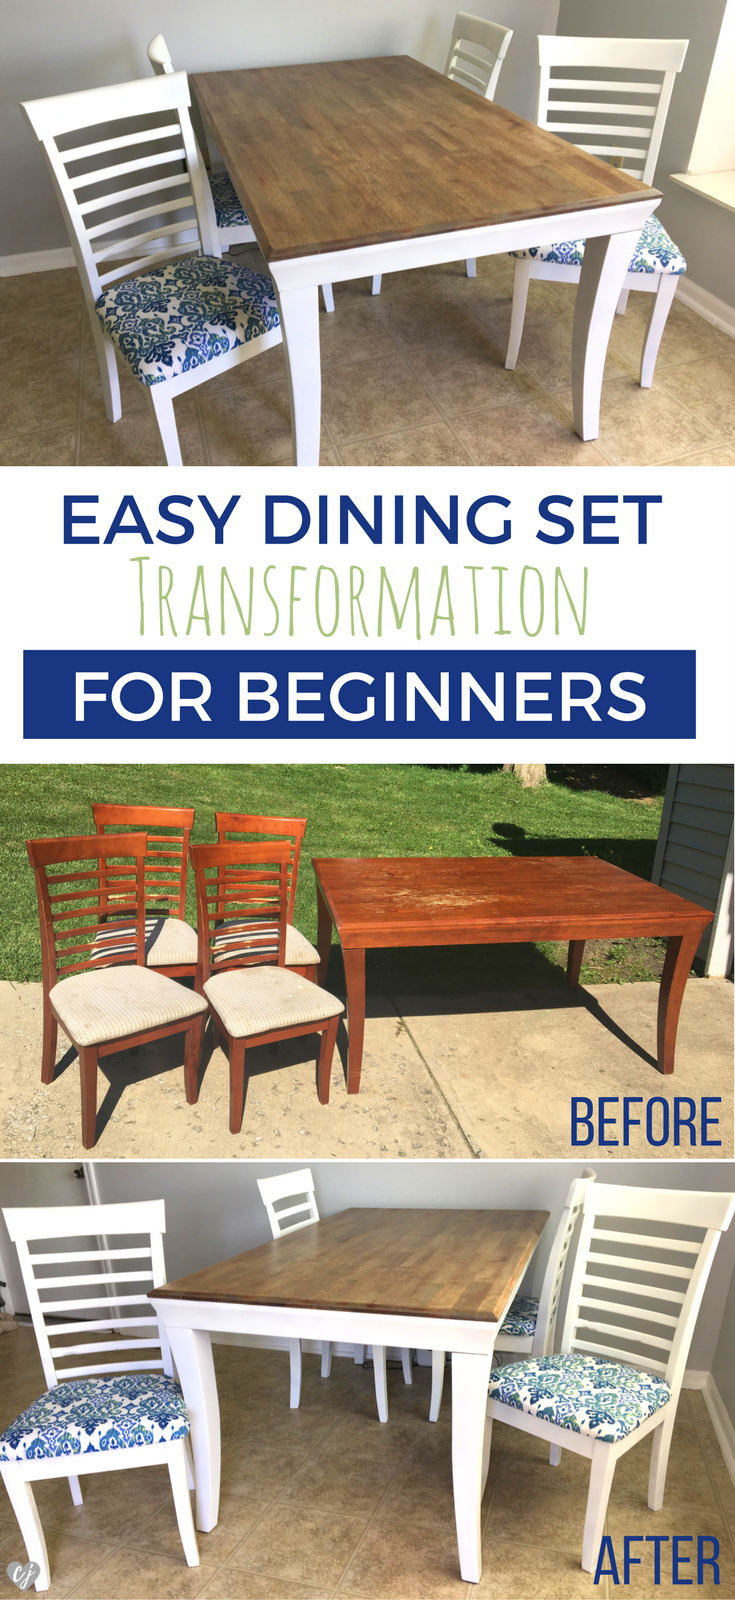
This was my first and might I say very successful furniture transformation! I’ve always been wanting to do something like this and a dining room table and chairs seemed like the perfect start! We needed a set for our kitchen and my husband found this steal of a set for $50 on craigslist! I did a ton and I mean A TON of research reading different articles and tutorials for step-by-step instructions and materials. However, there wasn’t any one tutorial that I followed from beginning to end. I had to piece together all kinds of information so I thought this would make the perfect post if you are wanting an easy dining set transformation for beginners guide!
I realize every project might be a bit different or require different steps/materials. But I’ve had so many people ask me how I did mine so I thought I would just create a post about what I did! First things first – you gotta get a table and chairs for cheap. Search craigslist, yard sales, estate sales or even hand-me-downs for something cheap that will make for a great looking piece once it’s updated!
Next you will need supplies. This was my list:
- 5 pack square sand paper – 80, 120 & 220 grit each
- Electric sander (borrow from a friend or neighbor to save some money if you don’t already have one. That’s what I did!)
- Safety glasses
- 8 pack of rags
- Painter’s tape
- Newspaper
- tack cloth
- Minwax Pre-Stain Wood Conditioner
- Minwax Wood Stain – Weathered Oak
- 8 cans Krylon Colormaster Paint & Primer Matte White
- Face masks
- Minwax Polycrylic Protective Finish – 1/2 pint can Matte
- 4 cans Minwax Polycrylic Clear Spray – Satin
- batting
- fabric
- staple gun
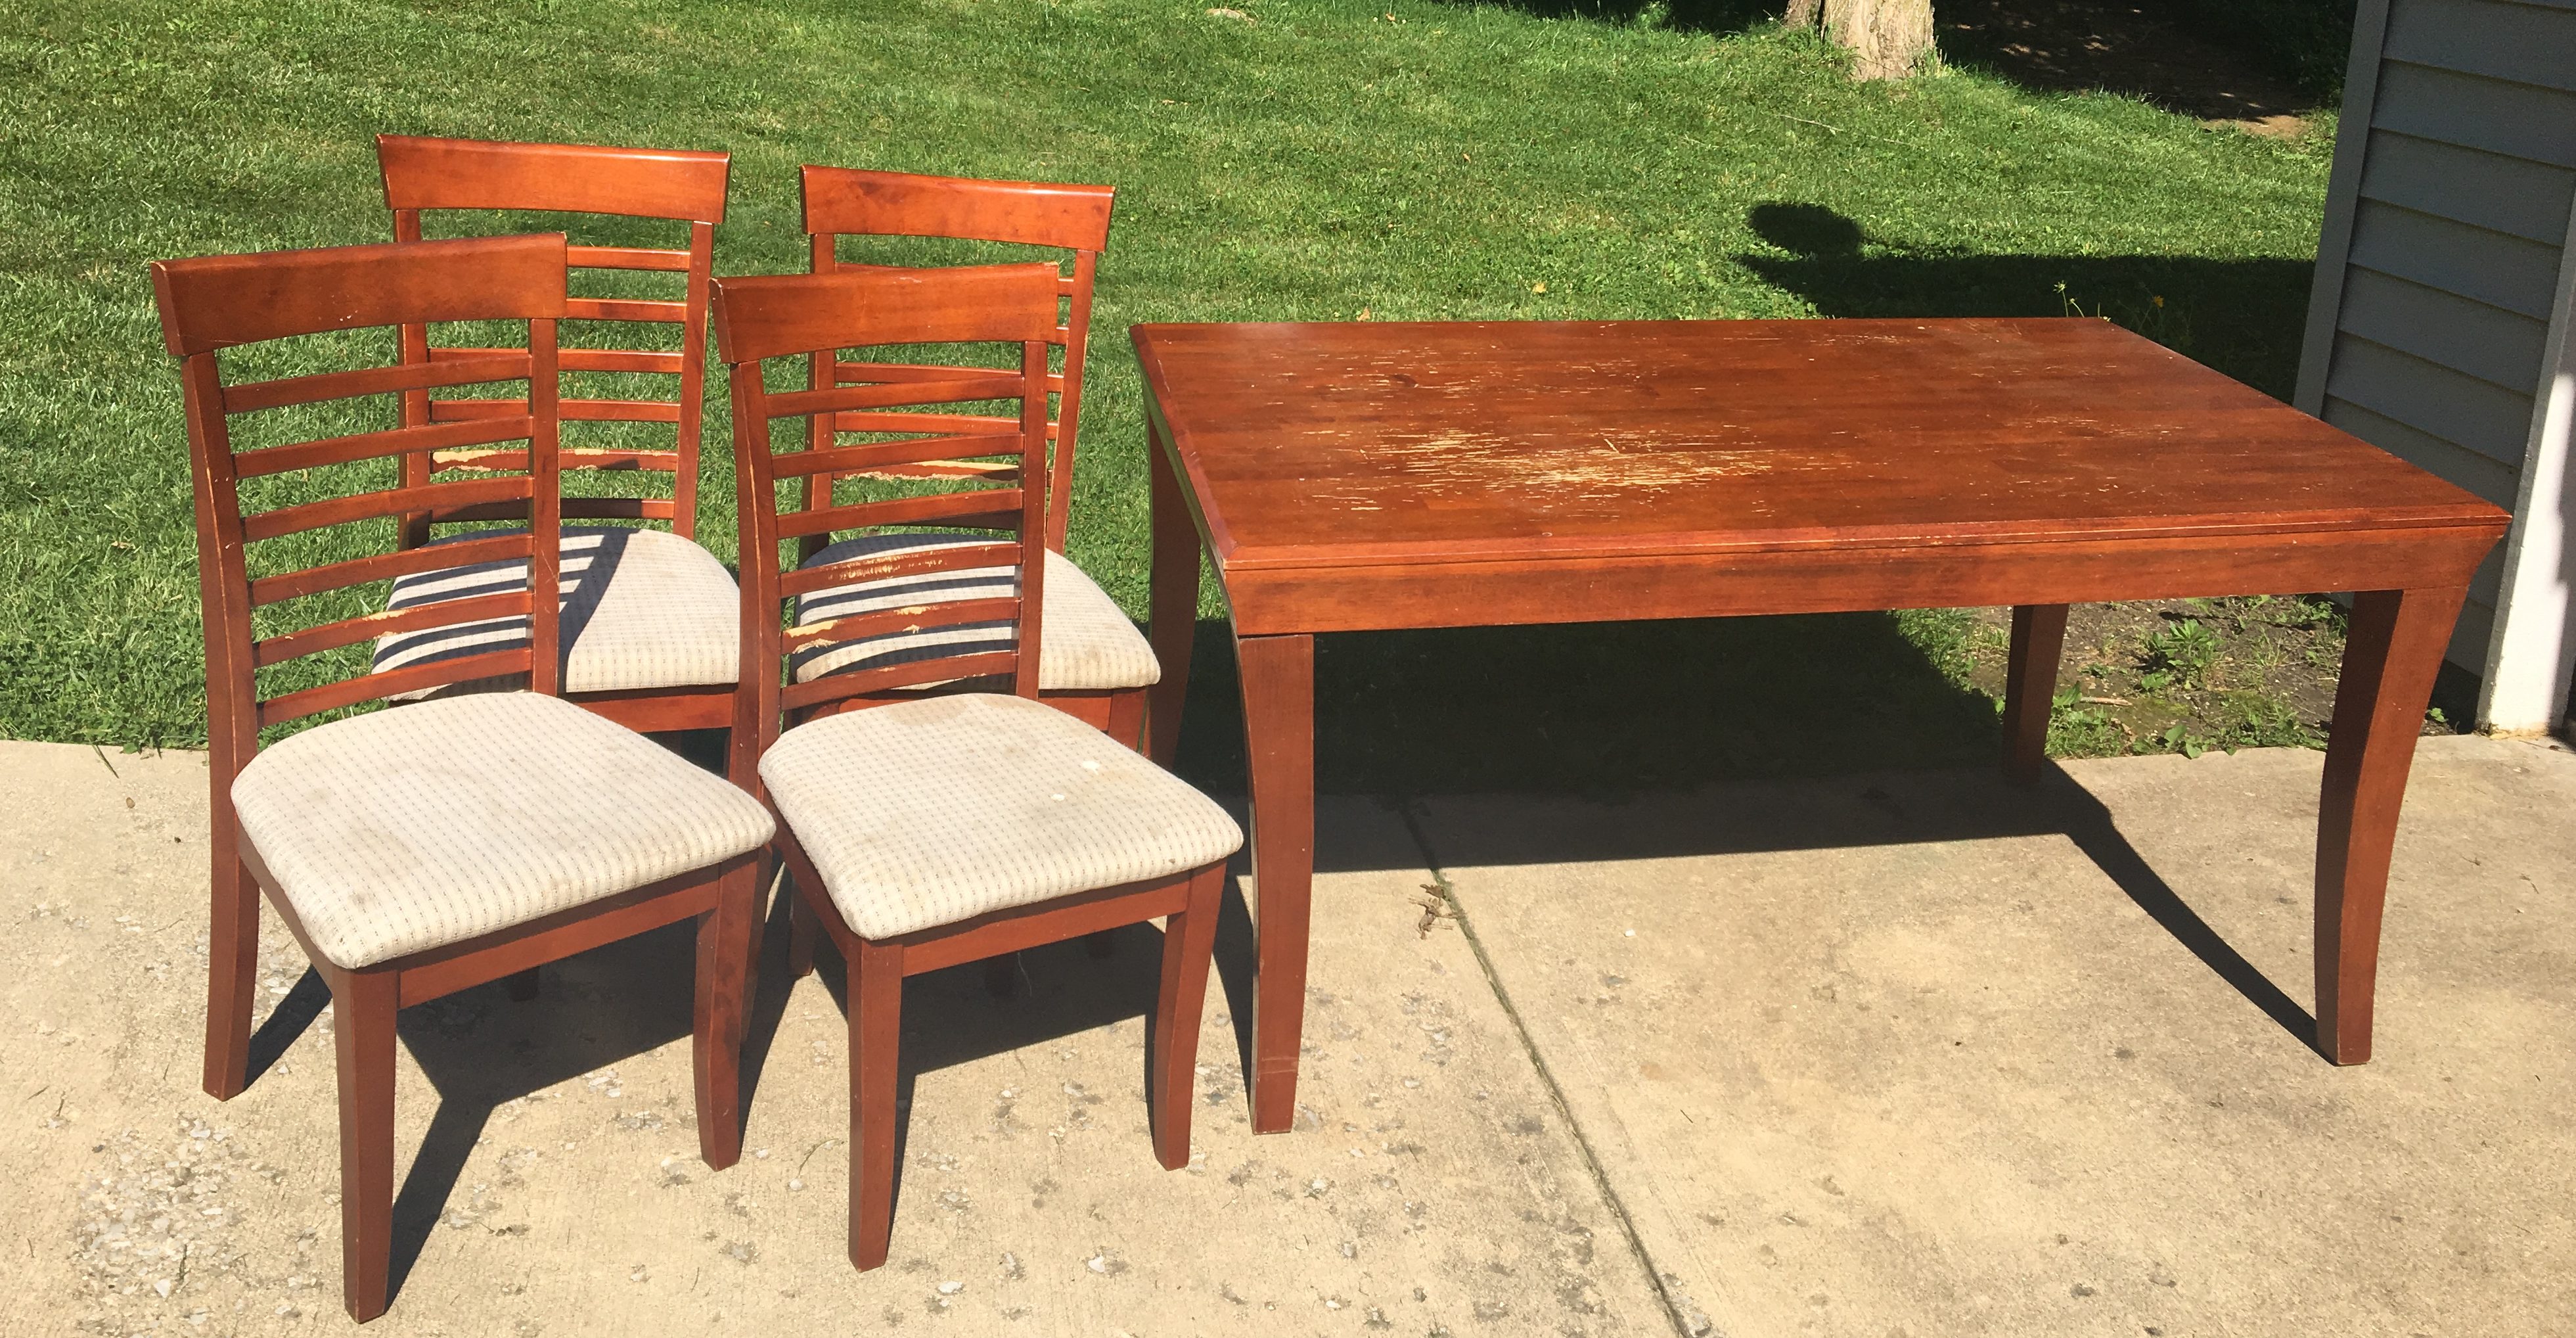
This is what the dining set looked like when we bought it. It had an orange-y stain all over with cream patterned seat fabric that was ratted and stained. The first thing I did was take the seats off the chairs.
The table top had a lot of wear and scratches. 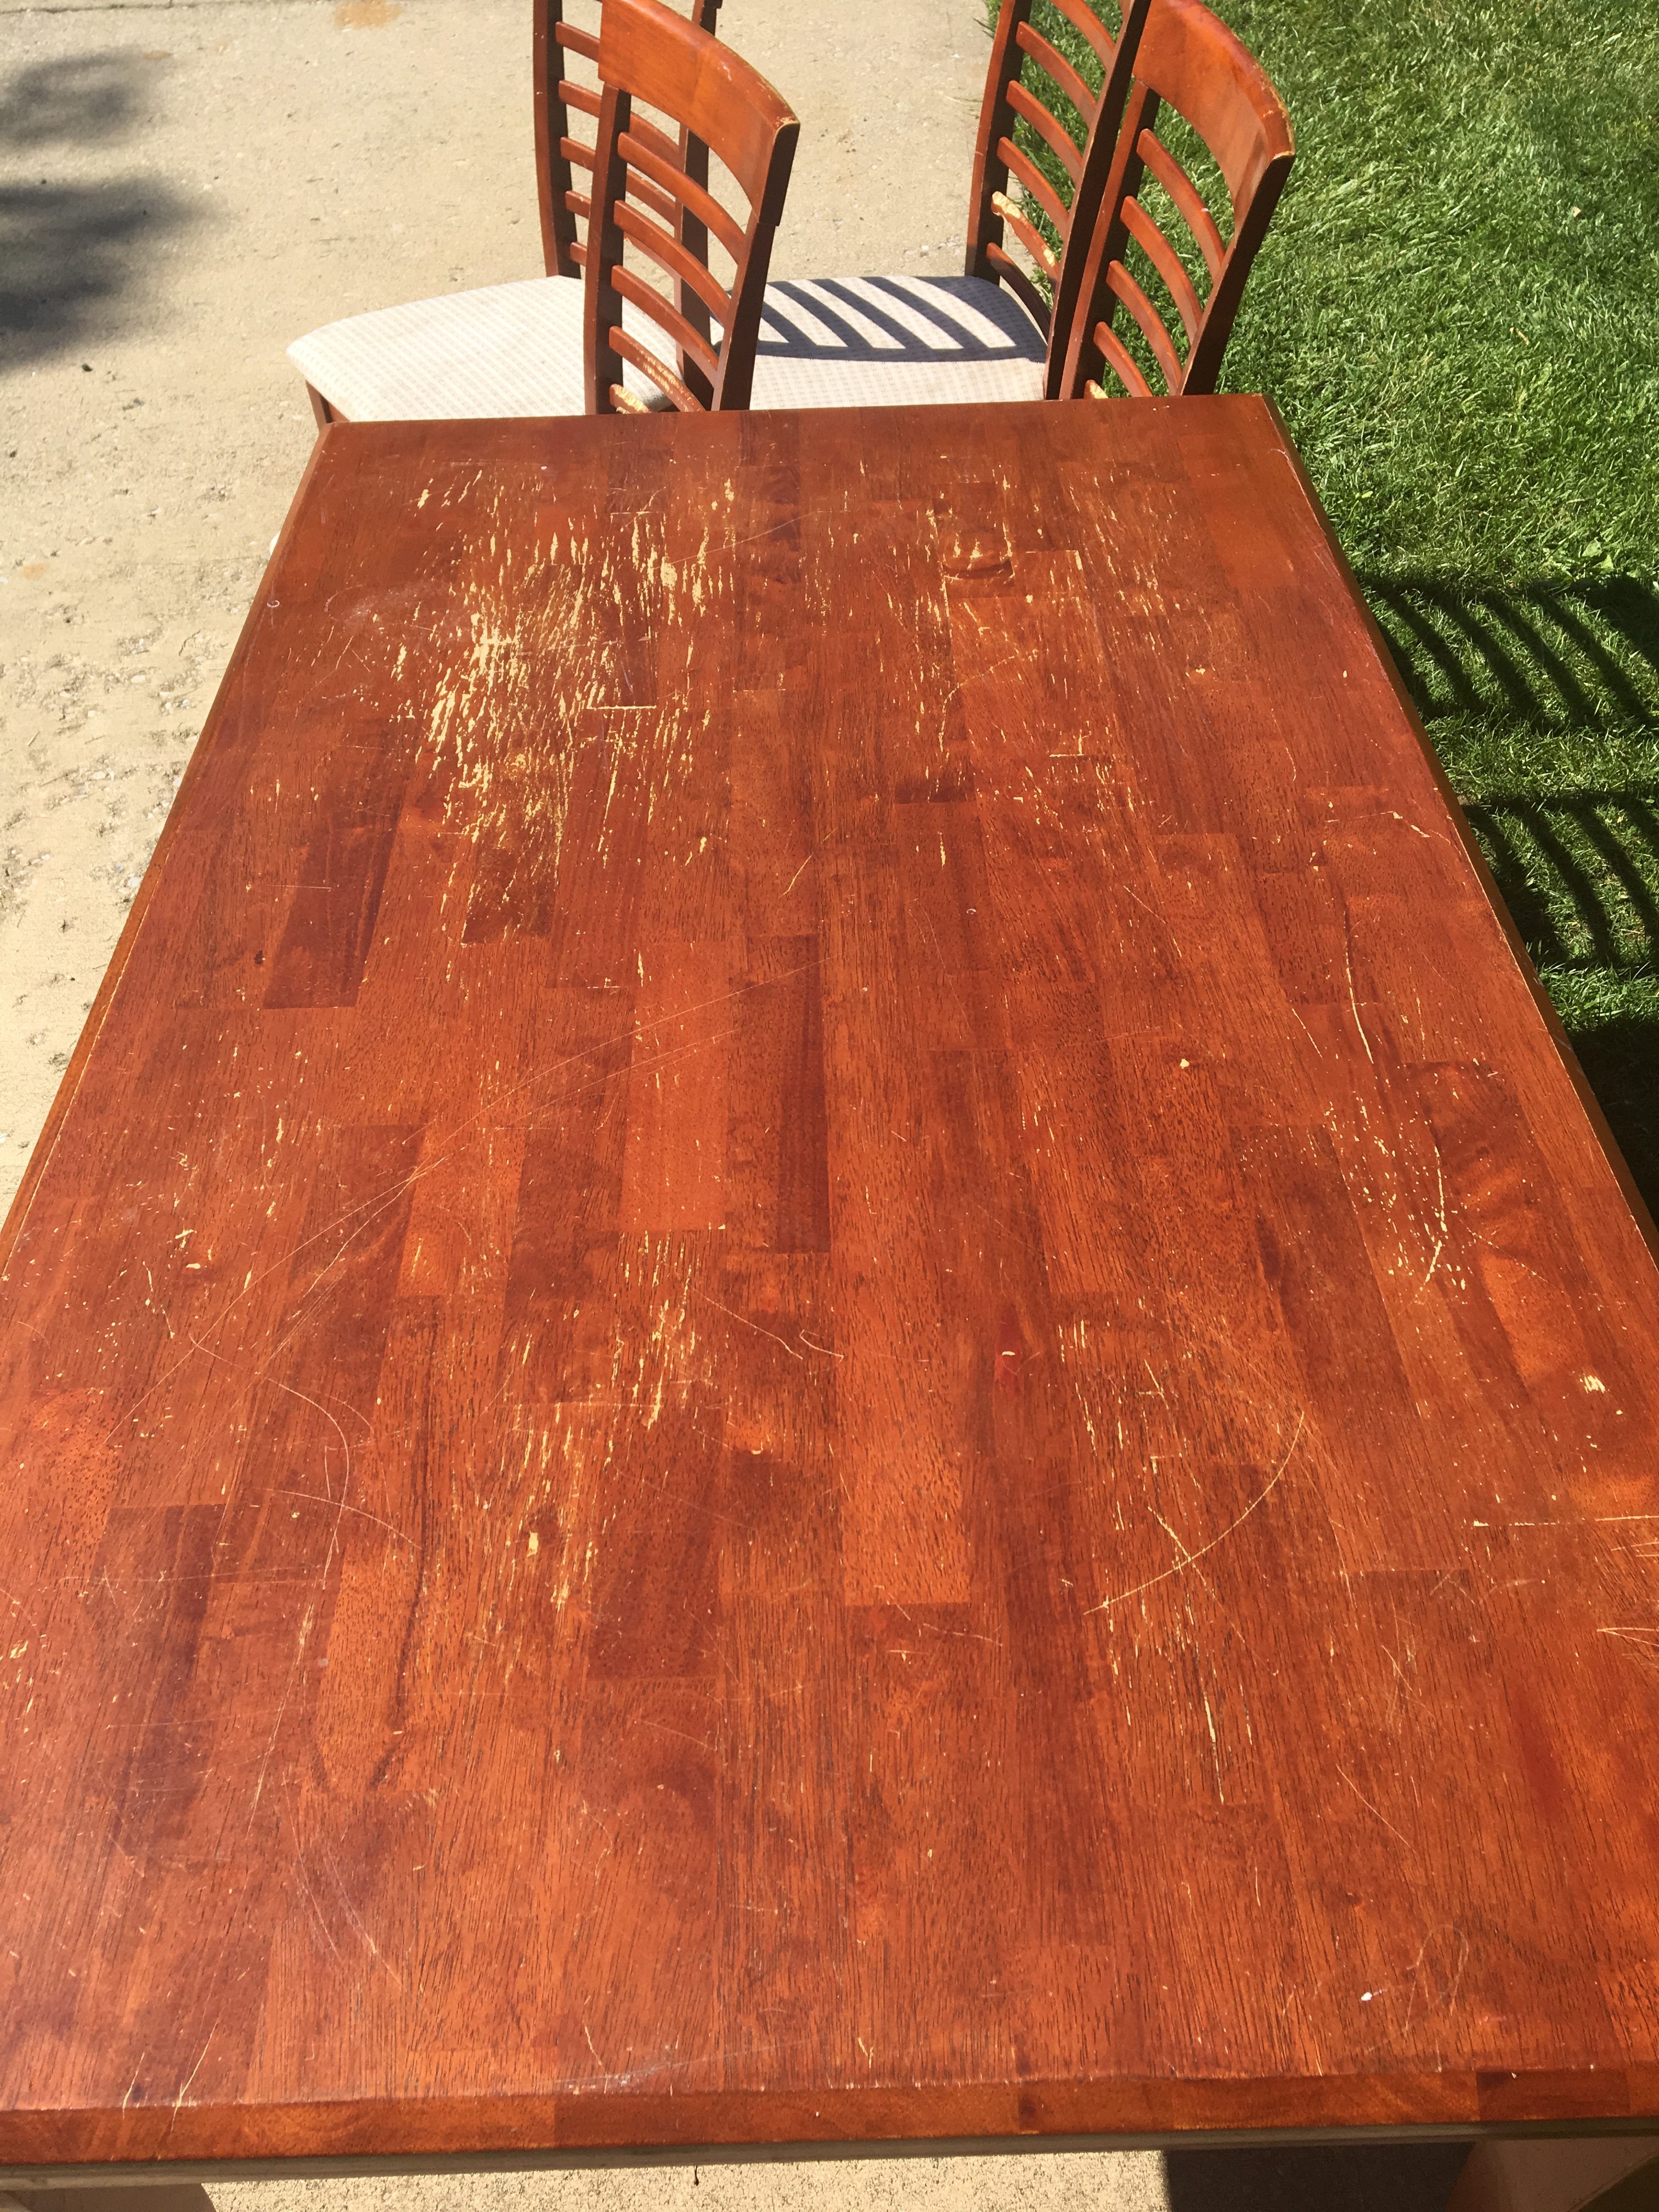
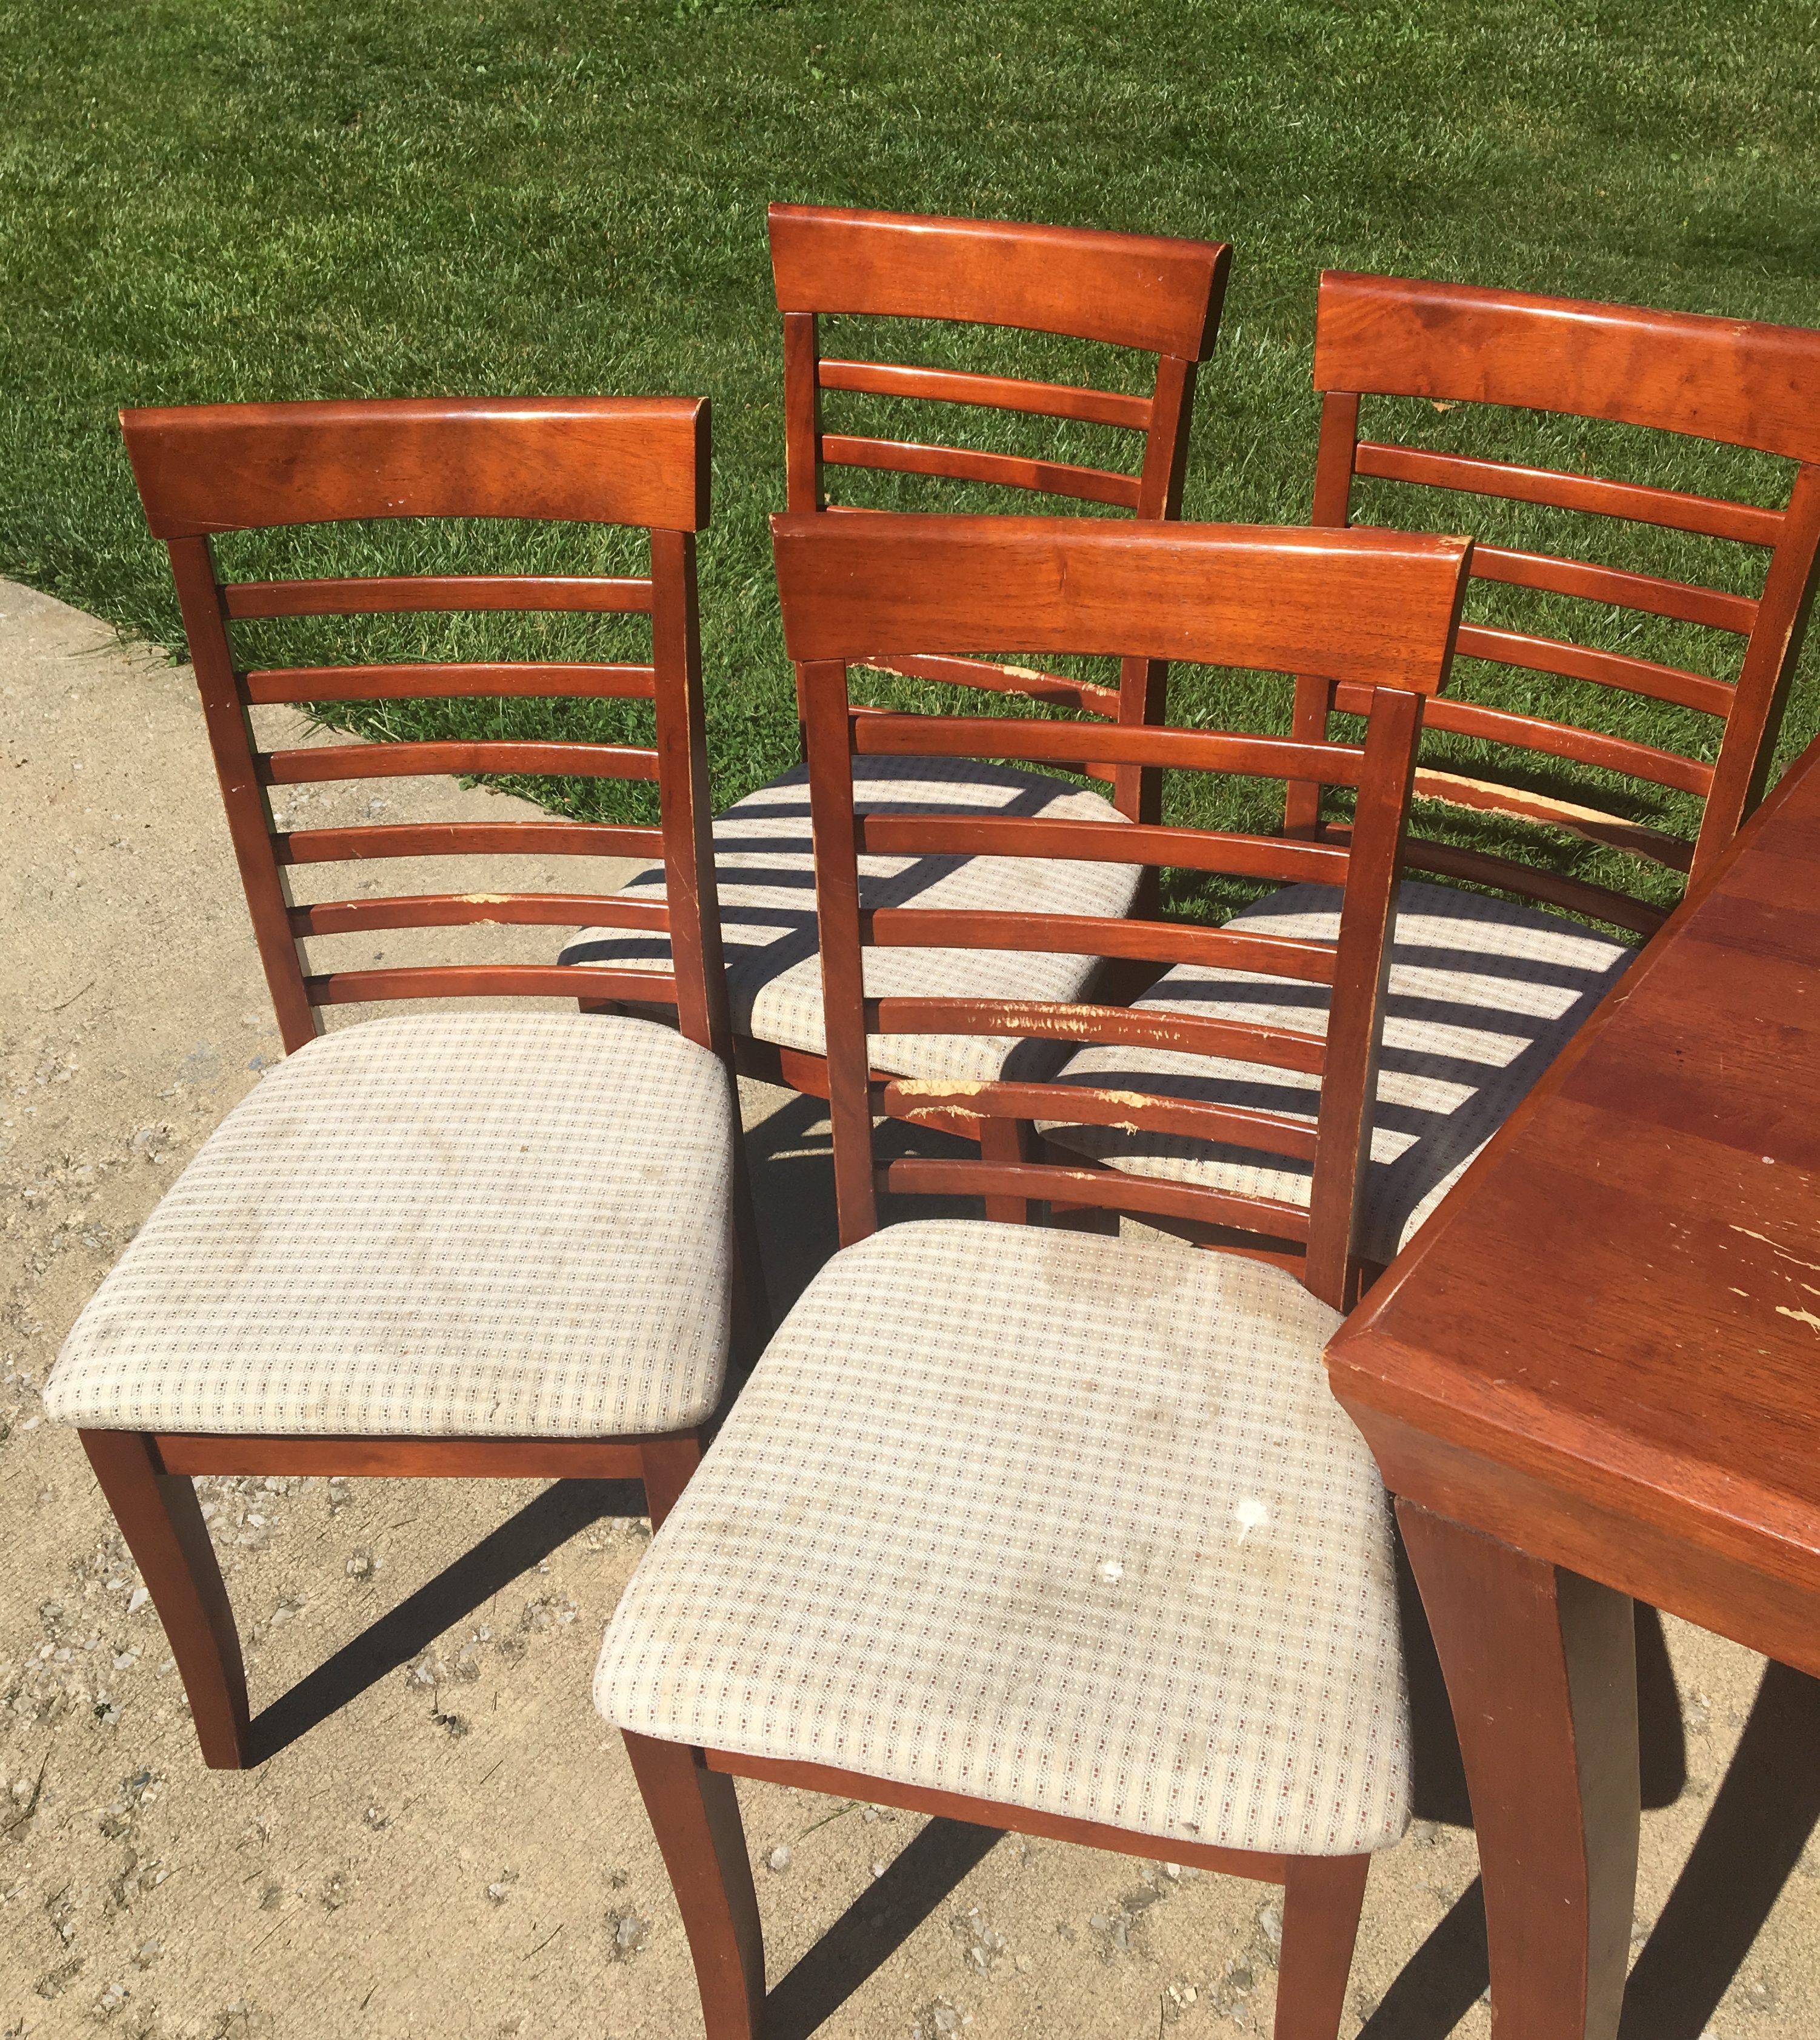
If you look closely, you can see that some of the rungs on the backs of the chairs have chew marks from the previous owner’s dog. We almost didn’t buy the set because of these but figured we would be able to sand over them and make them look smooth. Chair cushions….can you say NASTY!
I also took the legs off the table. After I took the seats and legs off, I started sanding! I used my 80 grit paper first. Because this set was stained and sealed, I needed a rough grit paper to start so I could get through the protective layer finish and the original stain of the set easily. I used my electric sander to sand every square inch of the set that I could get to. I thought I was going to have to hand sand all the chair rungs but my sander was able to fit through the spaces!
TIP: Something I learned through all my research was that if you are planning to re-stain, you HAVE to sand until you get down to the raw wood otherwise the stain isn’t going to soak in and the color is going to be off. I knew I wasn’t going to be able to do that with the chairs so I decided to paint those instead. I really wanted to stain the top of the table and luckily since it’s such a big and flat surface, I was able to get through all that orange stain until I got to the raw wood.
Here is the top of the table after I did the first layer of sanding with the 80 grit.
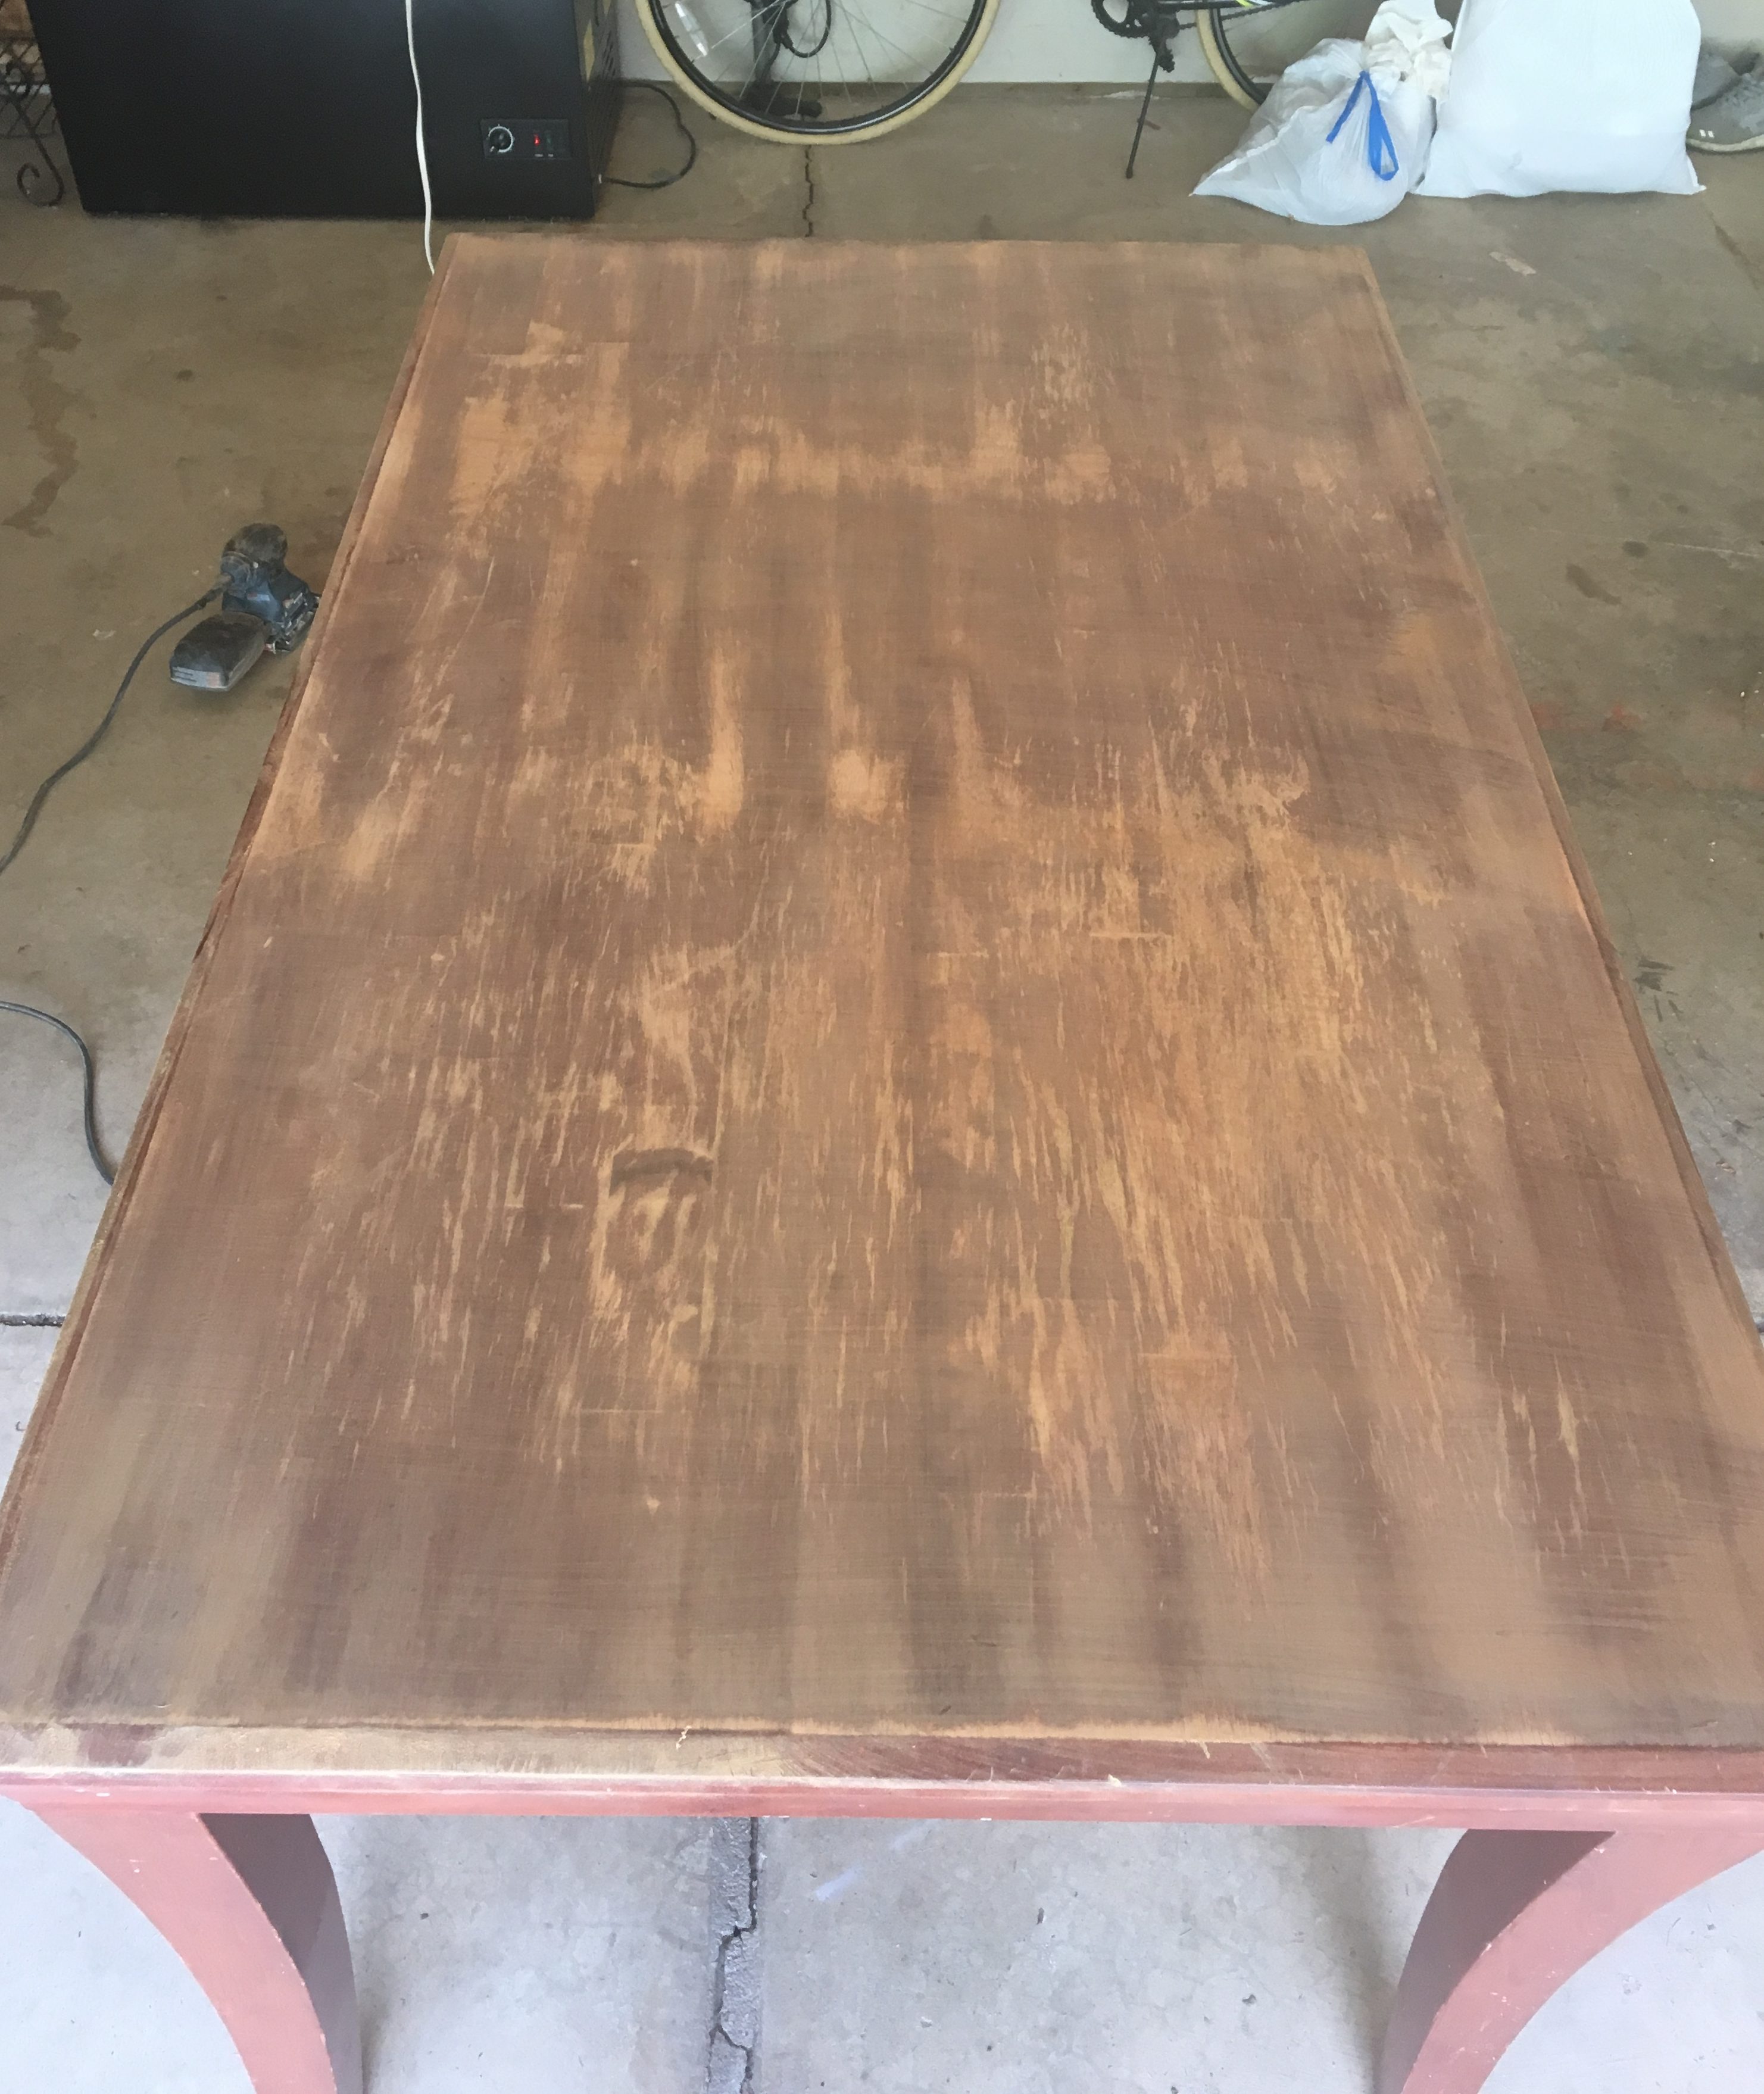
Here you can see a good comparison of the top of the table versus the original stain. (Again this is only with one layer of sanding done with the 80 grit.) It was able to get through the protective coat and a lot of the stain. (I realized that I must have taken the legs off after I sanded the table top so I wouldn’t have to bend over so far.)
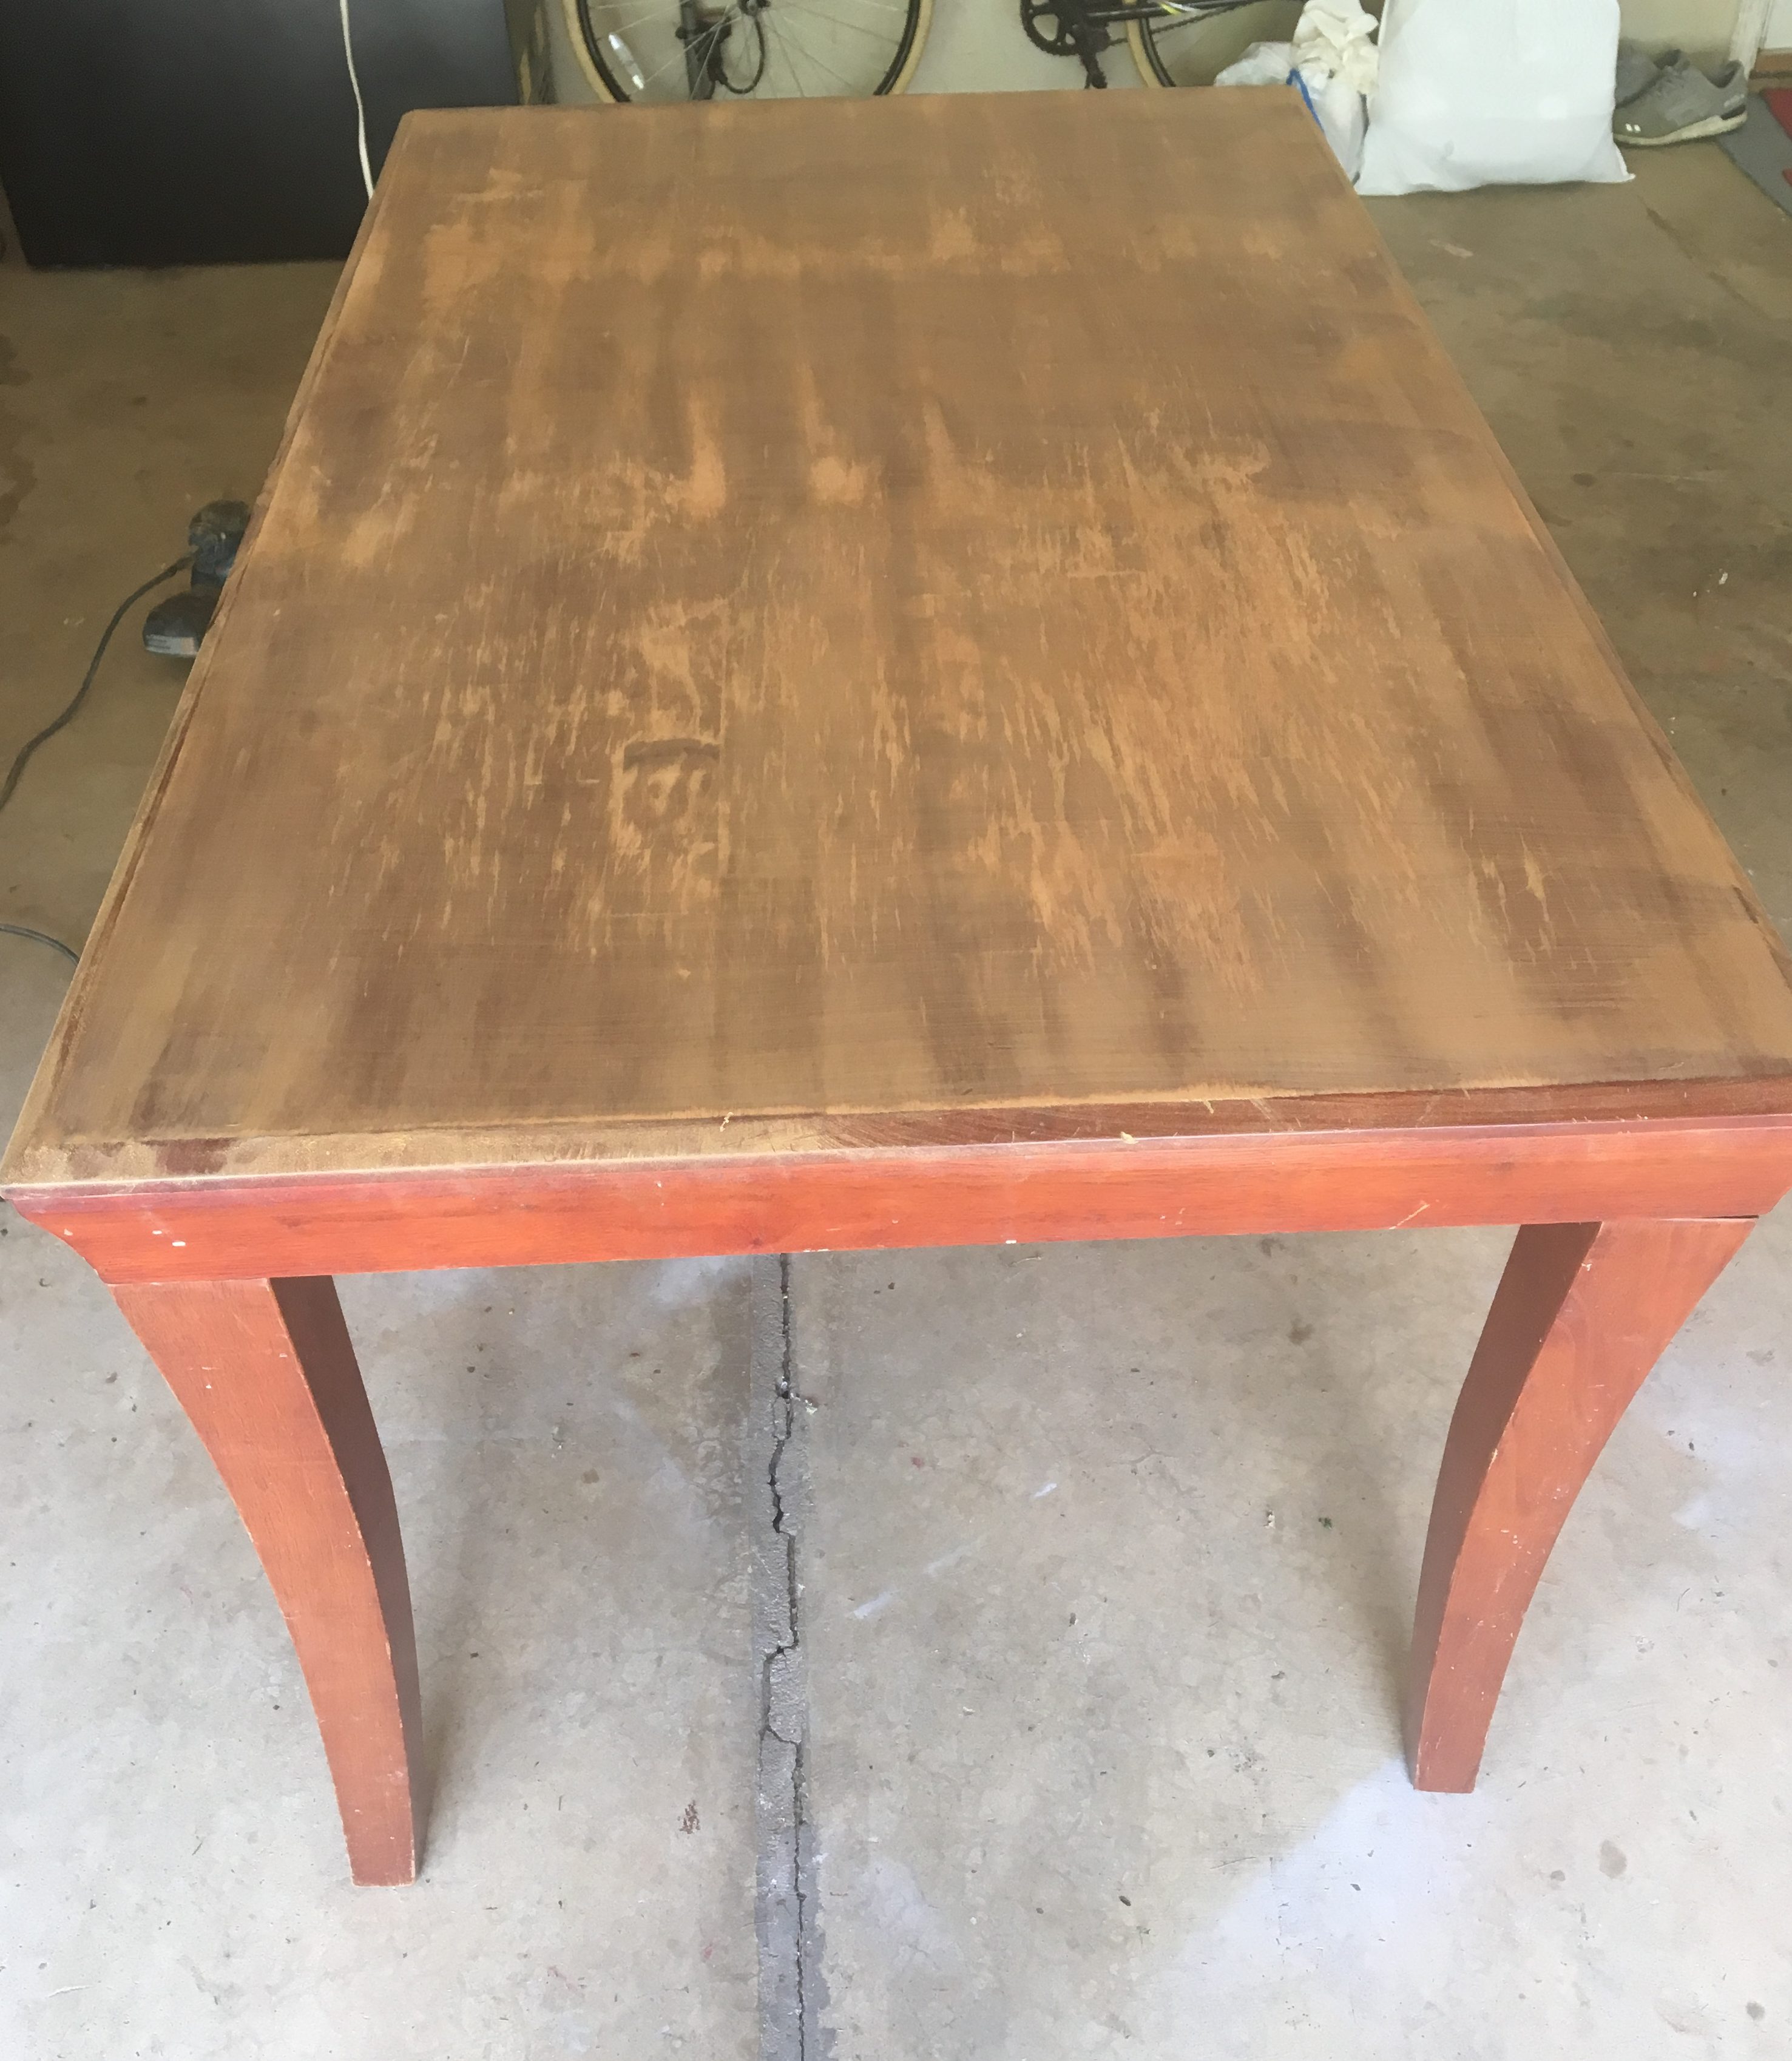
So I sanded every inch of the set with 80 grit then wiped everything down with a rag to get the sawdust off. I repeated this same process with a 120 grit next and then lastly a 220 grit. The bulk of the sanding was done using the 80 grit because I was trying to get through layers of old treatment. Once I was done with the 80, the 120 and 220 went much faster. Overall, the sanding phase took the longest but I wanted to make sure I was really putting in the work to get a good base for my transformation. It might be tempting to take short cuts or skip steps but don’t! This part is so critical to how your transformation will turn out. The more work and love you put in now, the better the end result will be and the longer it will last! The last thing I wanted was to put all this time and money into this project only to have my paint start peeling or wearing off a year later.
TIP: Gradually work your way up to finer and finer grit sand paper. I started with 80 knowing I needed to sand a lot to get through lots of layers and 80 would get the job done quickly and efficiently. Then I needed a step in between so used a medium grit of 120 to start smoothing the surfaces out. After doing my research, you wouldn’t want to apply your finish after using a rough grit like 80 because the surface won’t be very smooth and the finish won’t apply well or evenly. Also, it’s hard to jump from a rough grit to a fine grit without something in between. You need a medium step to better smooth the work you did with the rough grit because a fine grit won’t do that. The 220 fine grit is really just a finishing grit to get your piece really smooth. It’s best to work your way up to that fine grit so your piece looks and feels great!
Once all the electric sanding was done, I went back in and hand sanded some nooks and crannies that the electric sander couldn’t get to. After that, I wiped down everything again with a rag to remove the sawdust and then wiped down everything again with a tack cloth. I’m really glad I got the tack cloth because it really removed a bunch of sawdust the dry rag couldn’t. A tack cloth is just a sticky cloth that will help remove more sawdust. It really gets your piece clean and ready to be treated. I was able to use one cloth for the whole set. However, I didn’t do this step until the very end of sanding right before I was ready to paint/stain.
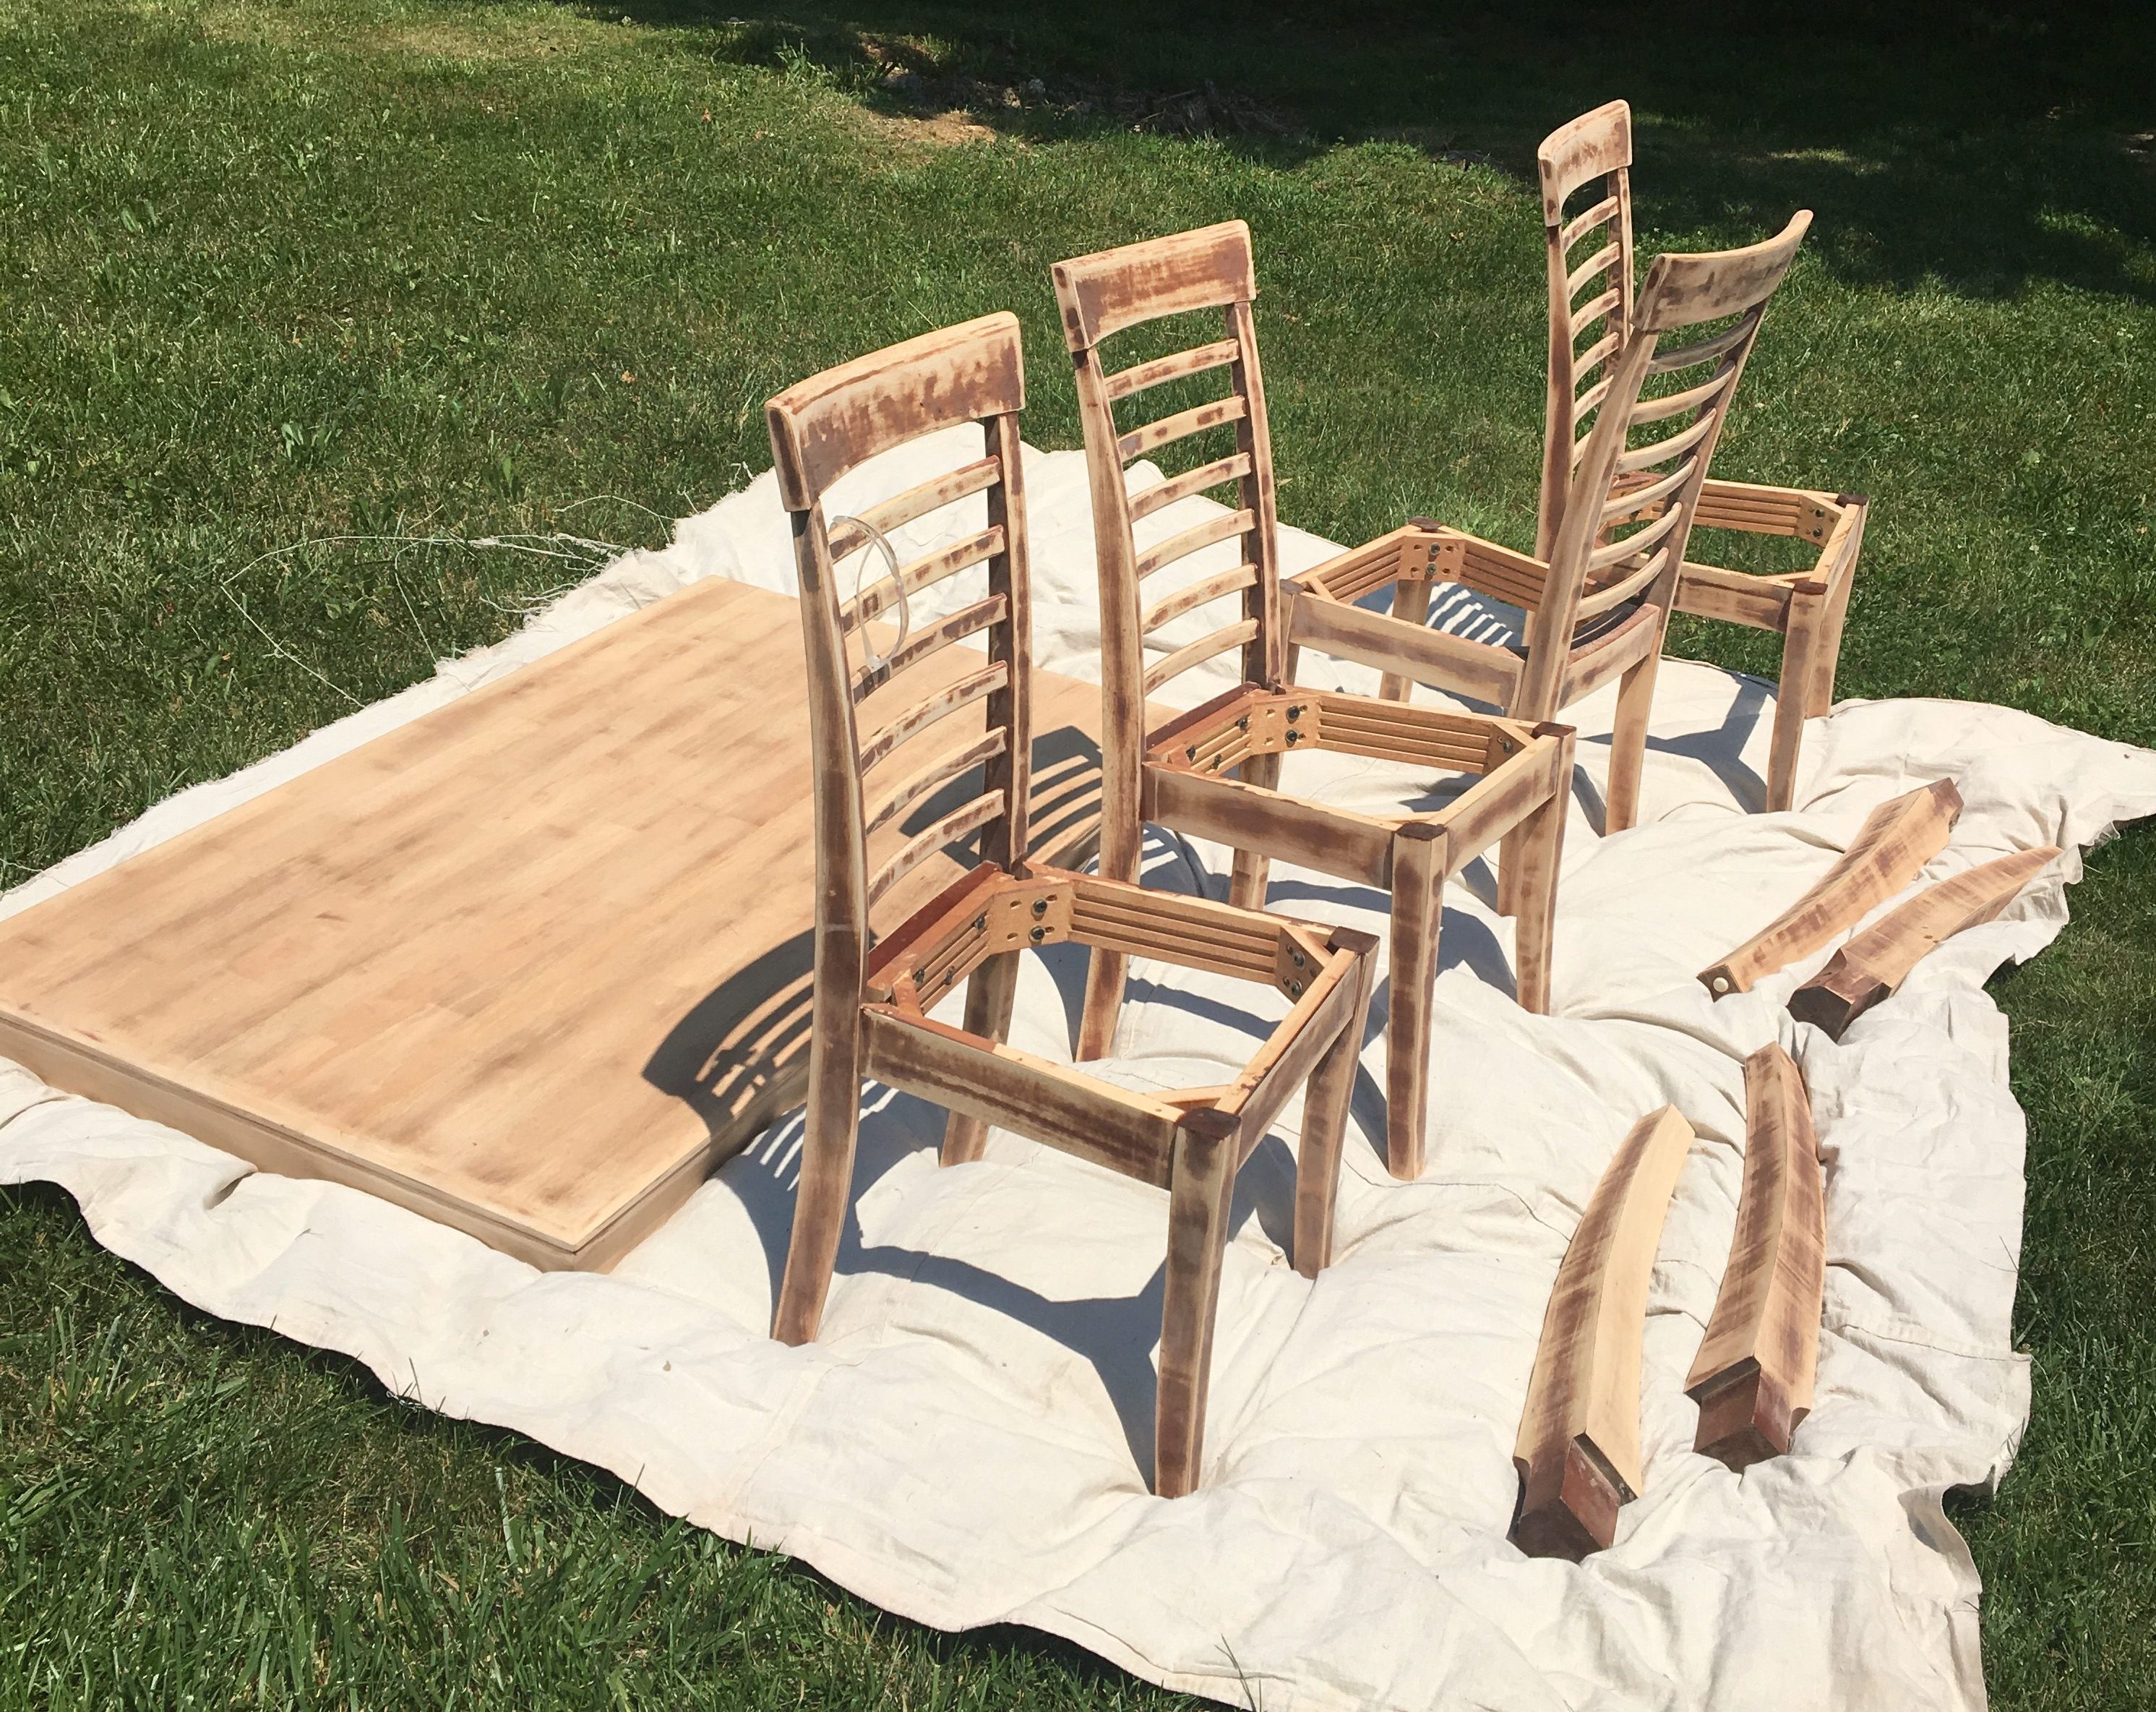
Here is the set completely sanded and cleaned! You can see that I was able to get to the raw wood on the table top but the legs and chairs still have stain marks. I knew I wasn’t going to stain those so I didn’t take as much time trying to get to the raw wood.
For the table top, I taped off the table skirt with newspaper and painter’s tape so just the top layer of table was visible. I used my pre-stain wood conditioner to prep my tabletop for stain then went in with the weathered oak stain! I used two light coats of stain and just wiped the stain on with a rag, let it sit for 3-5 minutes, then wiped it off. The weathered oak stain was perfect and I love the way it turned out!
Then I removed the newspaper and taped it over the table top to completely cover it so I could spray paint the table skirt white. Between each layer of paint or stain, I did a light hand sanding with my 220 grit to keep everything smooth and uniform. I really recommend doing this between each layer of treatment! It will help all the layers to adhere uniformly and will make the piece look and feel that much better.
I did 2 layers of white spray paint on the table skirt then moved onto the table legs and chairs. For the legs and chairs, I’m pretty sure I did 3 layers of paint. Knowing that my chairs and legs had dark stain still on parts, two layers wasn’t quite enough to make everything look opaque. I did light layers for all so that my paint wouldn’t build up and get goopy or bubbly. Also, the kind of paint I got was a paint + primer duo so I didn’t need to use primer. This will just depend on what type of paint you use. If you don’t buy one like I used with the primer included, I would highly recommend starting out with a primer first.
Again, I lightly hand sanded with my 220 grit between each paint layer. Once and a while, the paint would feel a little gritty once it dried so this really helped to smooth everything out and get a great texture. You will want to make sure that it isn’t super windy when you spray otherwise it will spray away all the paint causing uneven application and you will end up using more than you needed.
After all my painting and staining was done, it was time for the final step – sealing! I wanted a matte finish on everything. Personally, I don’t prefer glossy looking furniture. For the table top and skirt, I used a small can of Minwax polycrylic in a matte finish. I was able to do 3 layers with just this one can. I used a synthetic brush to brush it on. This helped to avoid drips and streaks. If you are using white or light colored paint, you MUST use polycrylic. If you use polyurethane, it will turn your furniture yellow! You only use polyurethane with dark colored stains and paints.
Again, I feel like a broken record saying this but I lightly hand sanded between each layer of poly with my 220 grit. I’m so glad I did! Trust me it will be worth it 🙂 At this point, you’ve come this far – don’t get lazy now!
For the chairs and legs, I used a spray poly in the same brand. However, I couldn’t find the spray in matte finish so I used satin. You can barely tell a difference so I was happy with that! Spraying the poly just seemed easier and less time-consuming than brushing it on. Plus I wouldn’t have to worry about drips or runs. I’m really happy with how the legs and chairs turned out! I didn’t have to go through nearly as many cans of poly on the chairs and legs as I did paint. I just did light thin layers.
TIP: I would highly recommend reading the directions for each treatment that you use and following the directions that the product comes with. Because this was my first time undertaking a project this big, I didn’t know shortcuts or tricks so I just read the directions on the cans and followed them and everything turned out great! I’m sure as I do more projects, I will learn more tips and tricks but I wanted to follow the instructions by the book this time to make sure my end product was the best it could be!
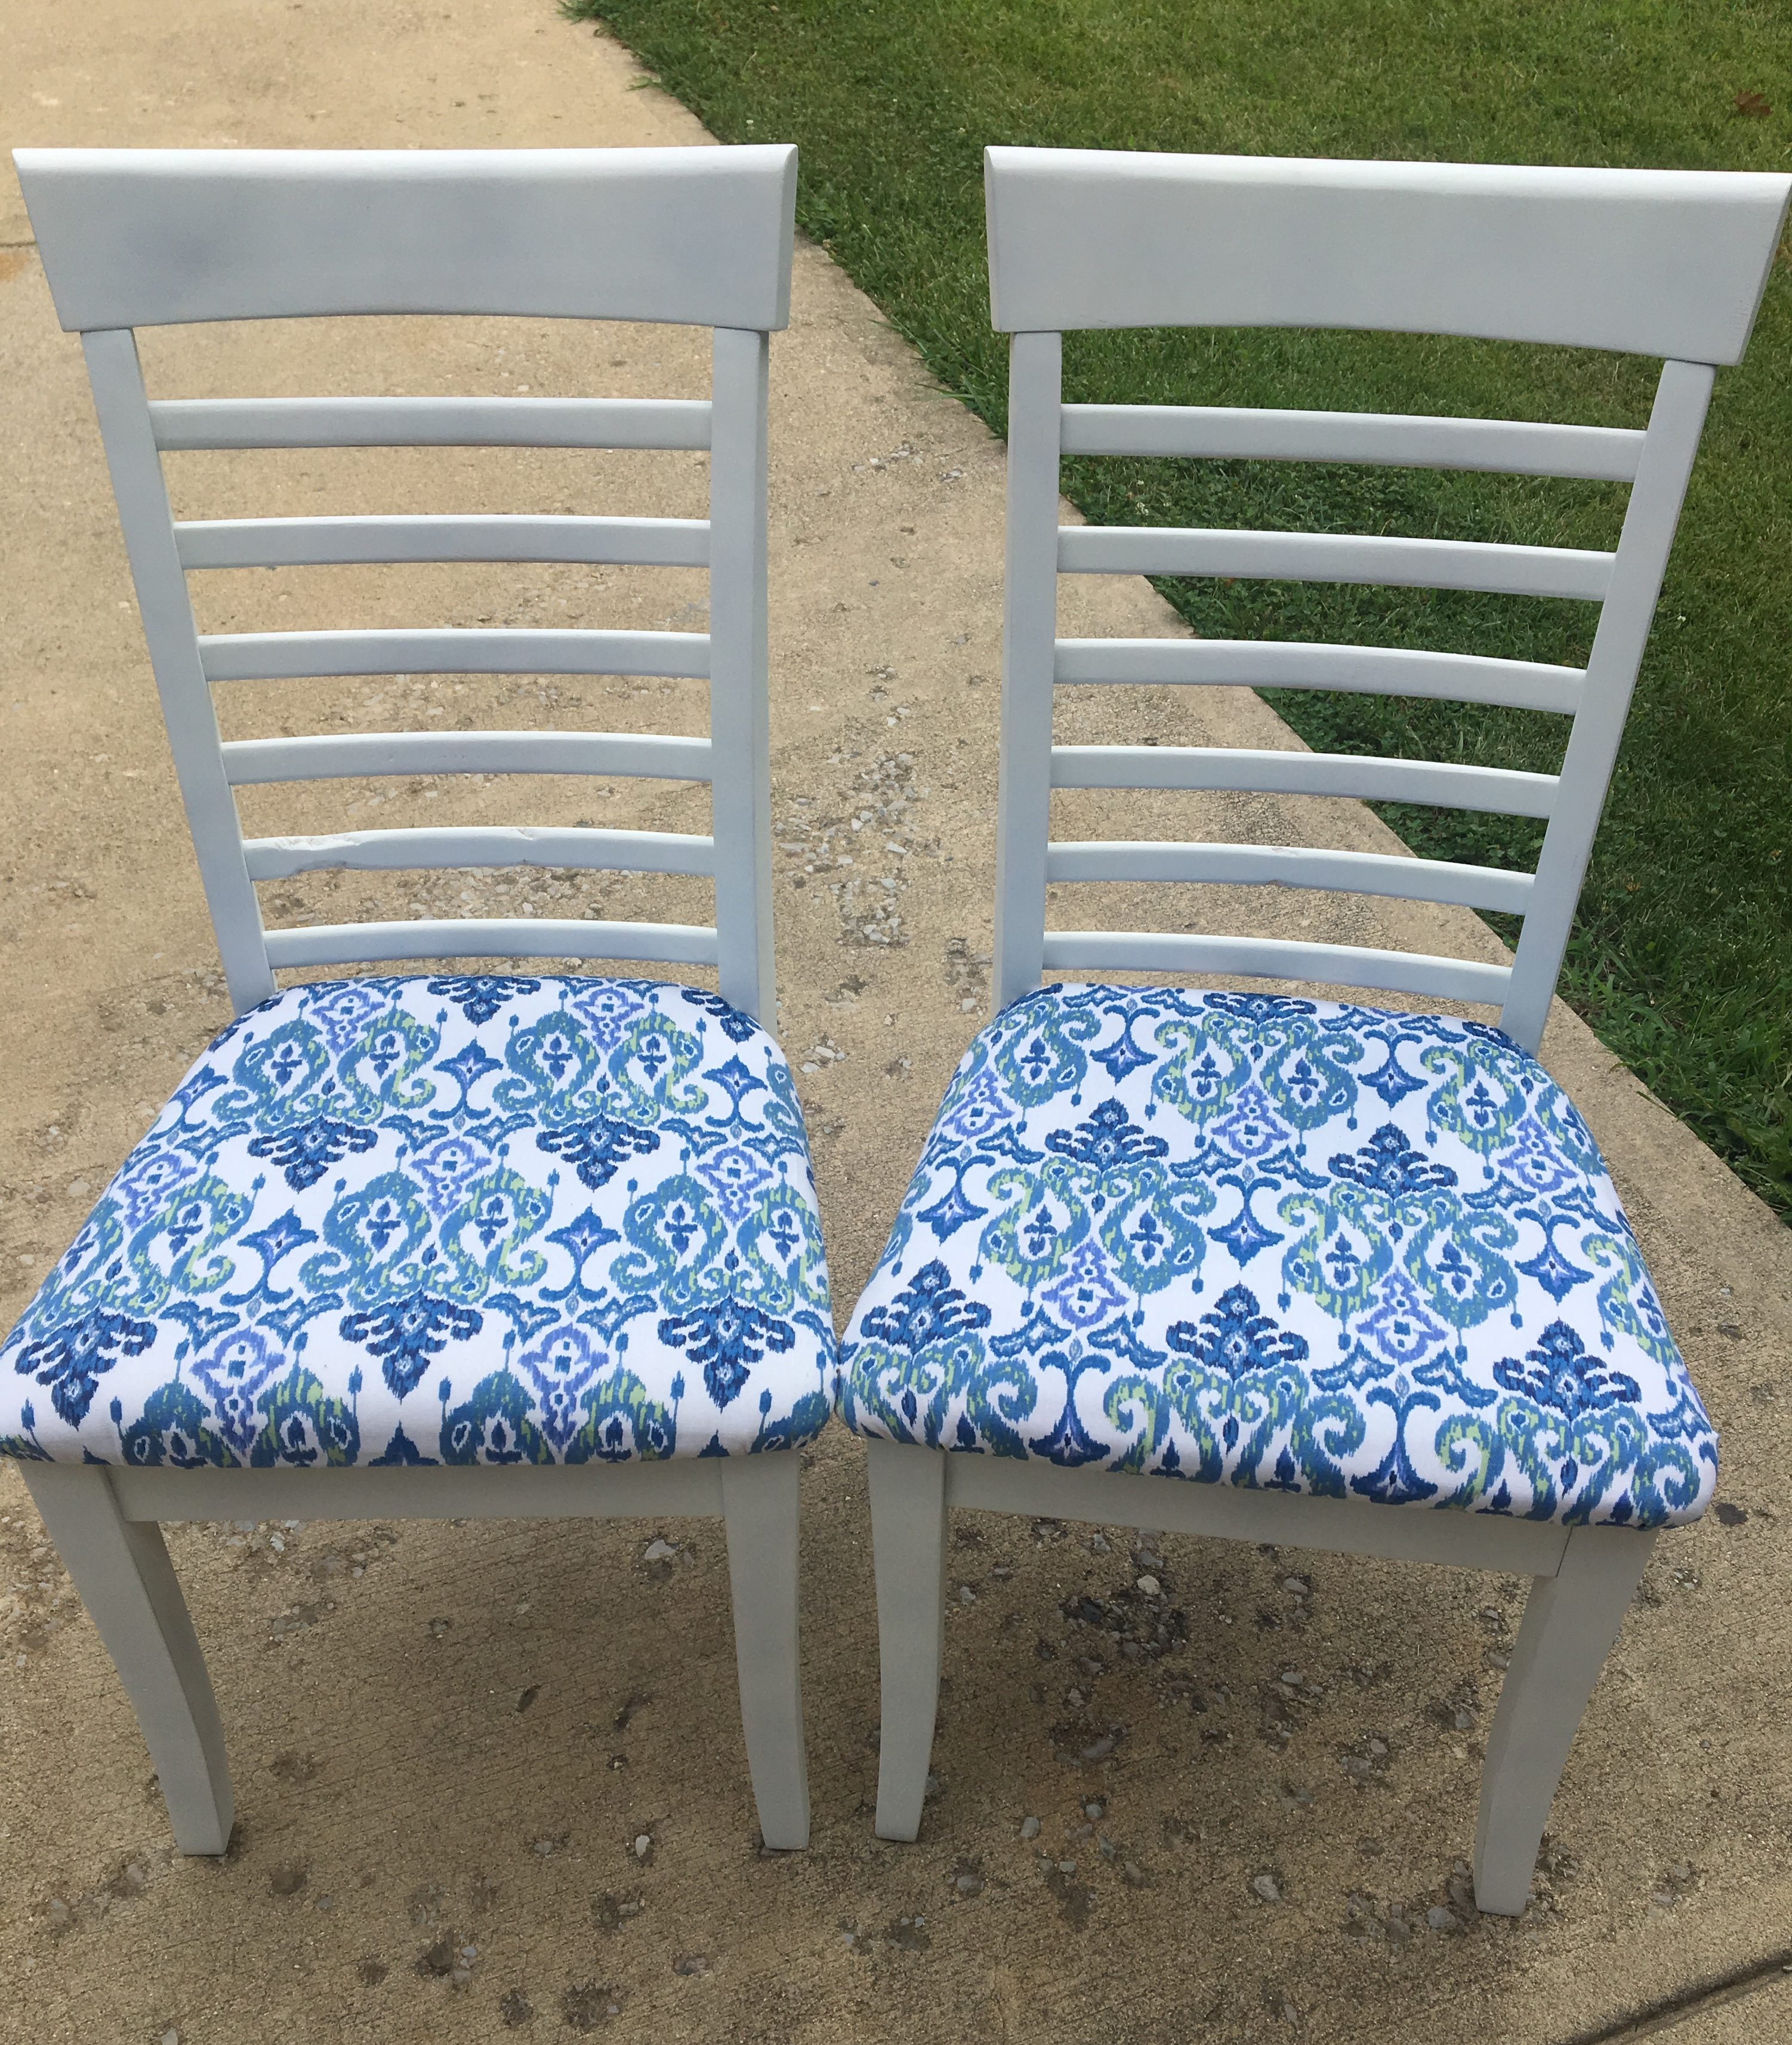
Last but certainly not least was the chair cushions. First, I removed the old fabric by pulling out some of the staples on the bottom of the chair and cutting it really closely until I could pull it off. Once the fabric was removed, I was left with a board in the shape of the chair seat and a thick cushion on top of it. I went to Joann Fabrics and bought some batting to give the chairs some extra cushion. The original foam cushion was pretty thick so I didn’t want to make the seat too much thicker. But you could tell the cushions were deflated a little from people sitting on them so I wanted to beef up the comfort factor just a little bit.
I also picked out a fun new fabric in the home decor fabric section of Joanns. I would recommend something a little thicker than just normal thin cotton fabric but not as thick as upholstery. The fabric in the home decor section had signs on the aisles that said “home decor” fabric and the fabric felt a little thicker which I think will hold up well.
I measured the chairs beforehand to know how much fabric I needed. Then I added another 3 inches around the whole thing to account for wrapping it around the seat and stapling it to the back. It’s better to have too much fabric than not enough because you can just cut off the extra.
With my fabric face down so the pattern was facing the floor, I stacked all the layers in reverse order ensuring the pattern was going to be straight. I positioned the batting first then the thick original foam cushion then the seat board on top which would be the bottom and underside of the seat. I cut the fabric around the whole thing including my 3 inch border of extra fabric to fold over.
Once it was cut out, I started at the side of the seat that would touch your legs if you were sitting (the front of the seat) in the center. I started wrapping the fabric around up and over the seat and stapled it into place. (My husband helped me with this part so if you have another person that can assist in pulling the fabric or stapling, that would be very helpful!) I just worked my way around the whole chair seat making sure to take my time around the corners of the chair trying to avoid folds.
Pick everything up and look at the top of the seat to check your work every once and a while. This will help ensure the pattern stays straight. If you mess up, just take some of the staples and reposition!
I worked my way around and ended at the back of the seat in the middle. Once everything was stapled, I cut any extra fabric off so that I wouldn’t see it hanging down. Don’t trim too close to the staples so that the fabric won’t loosen. Finally, screw the seats back on the chairs.
And that’s it!! I have a transformed dining set! All in all, I would say I probably spent around $150 included all supplies and the cost of the original set. I think that’s a great steal for how this turned out! I hope you found this easy dining set transformation for beginners guide helpful! Every project will be different so do your research and then make educated decisions 🙂 This definitely got me excited to do more projects so I think my next one will be building a king-sized headboard for our master bed! I will keep you posted on how that turns out and maybe I’ll write a post about it!
Finished product in my kitchen!
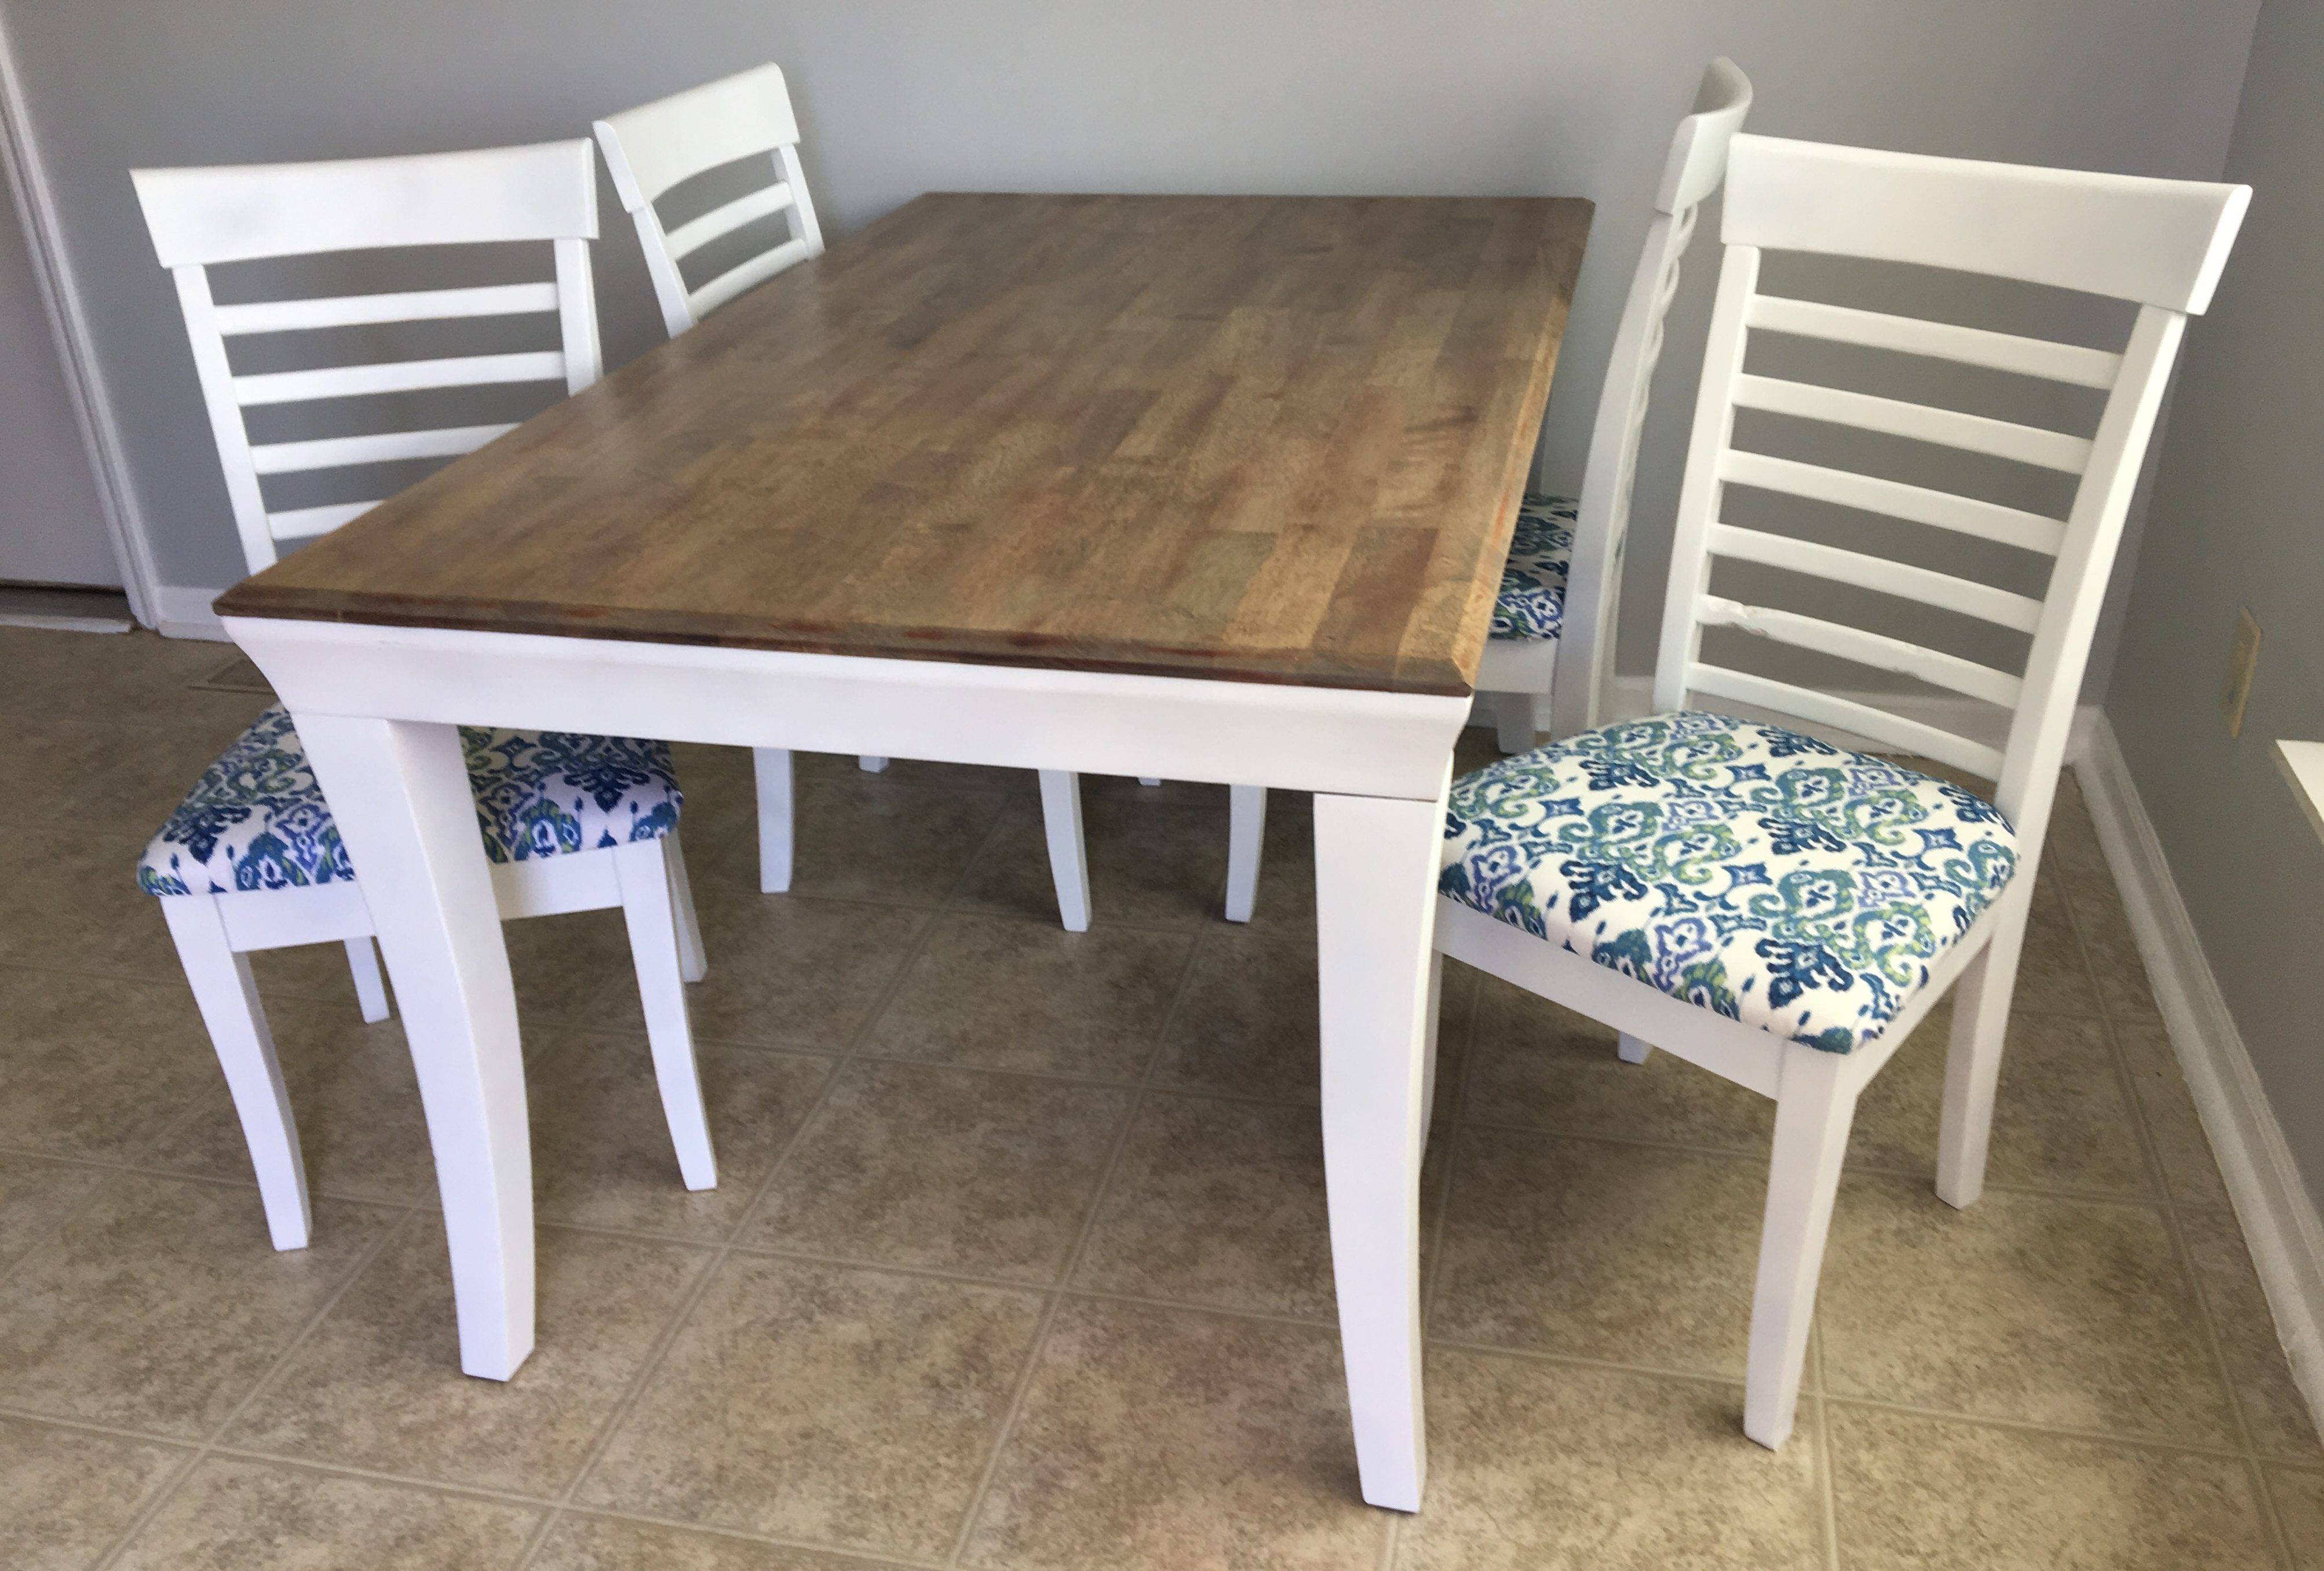
Close up of the finished chairs!
If you have another other specific questions about what I did that I didn’t address, feel free to leave a comment and I can answer!
Some of the links included in this post are affiliate links. View my full disclosure policy for more details.
Leave a Reply